Notice:
This post is older than 5 years – the content might be outdated.
Flutter is an open source mobile SDK which can be used to build iOS and Android apps with the same code base. In this article we want to get a more detailed look from an iOS perspective to see how we can create Apps with a native iOS look and feel and how we can adapt our iOS Knowledge to Flutter.
My colleague Tino described the basics in his past few articles. If you haven’t read them you can find them here:
Flutter is using Dart as a programming language and since the first stable version was released there are many apps available. If you want to get an impression you can see a few apps created with Flutter on this page. Because Flutter is in active development you can see the Roadmap here.
Project
By default Flutter is creating an Xcode project in Objective-C. If we want to have our Xcode files in Swift we have to add the parameter -i swift. To create a Flutter project we can execute the following statement in the terminal: flutter create -i swift [projectname].
Package Manager
The most widely used package managers in iOS are third party tools like CocoaPods or Carthage. In the generated Xcode project Flutter is using CoocaPods as well. The dart packages are managed by the so-called Pub Package Manager and we can manage dependencies in the file pubspec.yaml. When you add a package below dependencies it’s recognized as a package needed for our app to work. Dependencies needed only for development can be added below dev_dependencies. Once you add a package you need to run the command flutter packages get. A lot of available Dart packages are listed here.
|
1 2 3 4 5 6 7 8 9 10 11 12 13 14 15 |
dependencies: http: ^0.12.0+1 url_launcher: ^5.0.1 shared_preferences: ^0.5.1+1 flutter_cupertino_settings: ^0.1.0 ... dev_dependencies: ... |
Asynchronous Code
In Dart you can use async/await to execute asynchronous code. In Swift the pendant for this is a closure or a callback. It’s important to know that the code in Dart is only executed in a single thread. Asynchronous Code runs in separate isolates. Every isolate can run on a different CPU core but they can’t share memory. Instead they can only interact with each other by sending messages via ports (more information about ReceivePort and SendPort).
Architecture Patterns
In iOS we are using architecture patterns like MVC, MVP, MVVM or Viper. In Flutter there are good alternatives called ScopedModel and BLoC (Business Logic Component). BLoC is created and used by Google and ScopedModel is a third party package. You can find both here.
Design
Flutter includes two specific design languages which contain platform specific widgets. Material design for Android and cupertino design for iOS. To use the cupertino design we have to import it in our dart files.
|
1 |
import 'package:flutter/cupertino.dart'; |
Widgets
In iOS we are using the framework UIKit, which provides view and window architecture, event handling and different input types. Flutter has its own rendering engine which is using the concept of rendering a chain of widgets. There are two different types of widgets: stateful and stateless. A stateful widget is dynamic, able to dynamically change its own content. A stateless widgets is the opposite and not dynamic. It only shows the data passed into its constructor at creation time.
Storyboard
In iOS we are mostly using storyboards to create our user interface. In Flutter the user interface is written in code by creating these widgets and combining them to a widget tree. After a while it feels very familiar and because a lot of code can be reused, it doesn’t need much more time than the native iOS method. One big advantage is the support of stateful hot reload. That means that changes in the source code can be shown immediately on device or in the simulator without restarting the App. If you don’t want to generate everything by hand you can use the tool flutterstudio.
iOS-Layout-Structures
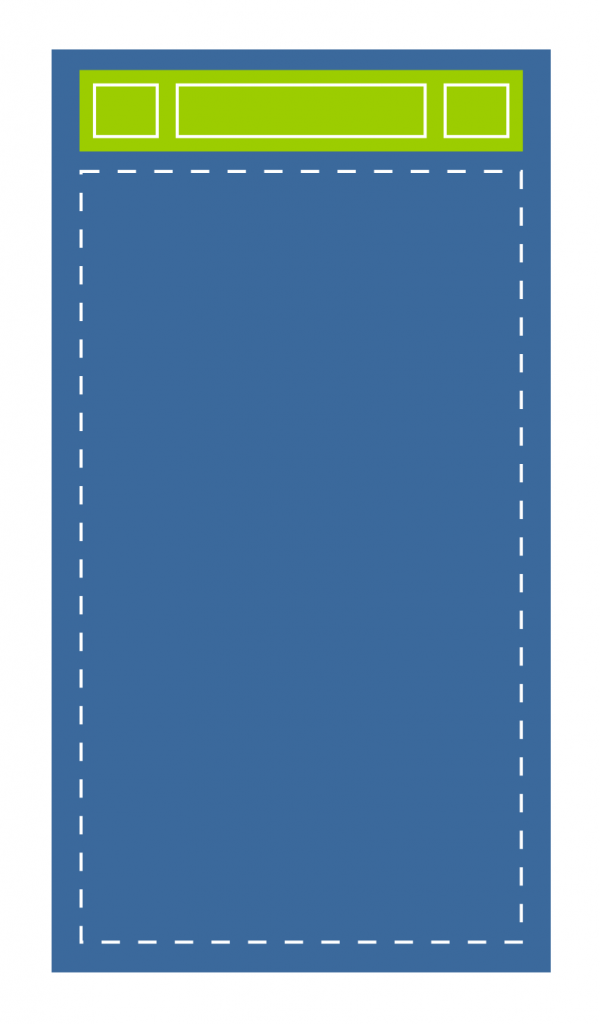
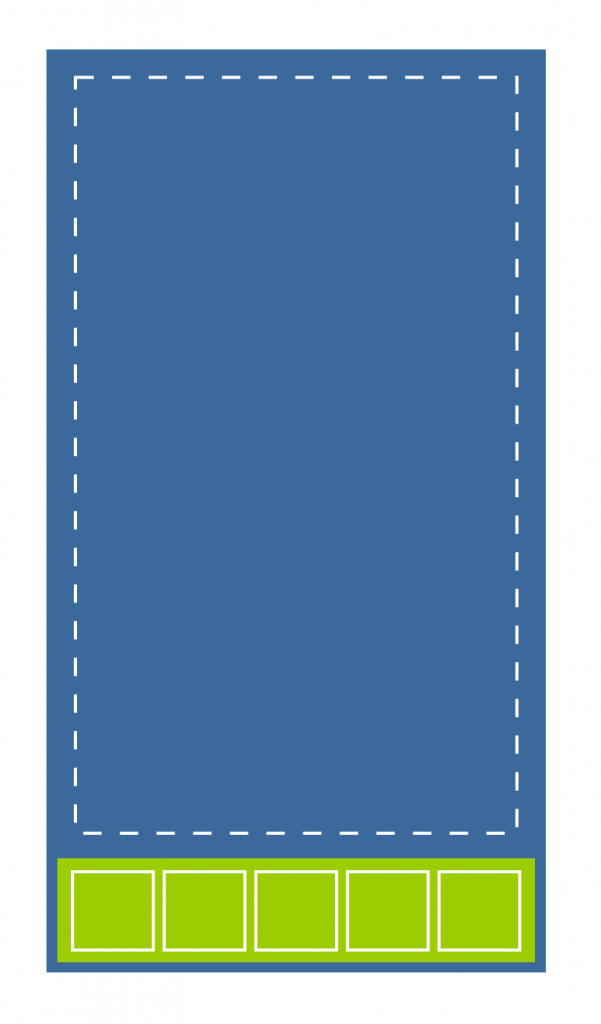
Flutter supports a few iOS based layout structures. A layout structure has the ending Scaffold and it describes what the root layout and the behavior structure should look like. CupertinoTabScaffold places the tab bar at the bottom, CupertinoPageScaffold places the navigation bar on top and the content is always placed in-between.
UITabBarController
In iOS it makes sense to start the user interface with an UITabBarController. In Flutter we can replicate this by creating a widget with a simple tab bar containing elements of type BottomNavigationBarItem. We use the structure CupertinoTabScaffold with the widget CupertinoTabBar. In tabBuilder we have to define the content of the tab bar entries.
|
1 2 3 4 5 6 7 8 9 10 11 12 13 14 15 16 17 18 19 20 21 22 23 24 25 26 27 28 29 30 31 32 33 34 35 36 37 38 39 40 41 42 43 |
final tabBarItems = [BottomNavigationBarItem(icon: Icon(CupertinoIcons.home), title: Text('Home')), BottomNavigationBarItem(icon: Icon(CupertinoIcons.book), title: Text('User')), BottomNavigationBarItem(icon: Icon(Icons.list), title: Text('Settings'))]; @override Widget build(BuildContext context) { return CupertinoTabScaffold( tabBar: CupertinoTabBar( items: tabBarItems, ), tabBuilder: (BuildContext context, int index) { switch (index) { case 0: return new HomeView(); case 1: return new UserView(); case 2: return new SettingsView(); } return null; }, ); } |
UINavigationController
In iOS the UINavigationController is one of the most used navigation components. It allows to create a navigation stack with push and pop view controllers inside and there is also a navigation bar on top with more information like a title and back button. When we want to add a UINavigationBar we can do so by creating a CupertinoNavigationBar widget. We define this inside a CupertinoPageScaffold layout structure.
|
1 2 3 4 5 6 7 8 9 10 11 12 13 14 15 16 17 18 19 20 21 22 23 24 25 26 27 |
import 'package:flutter/cupertino.dart'; class HomeView extends StatefulWidget { @override _HomeView createState() => _HomeView(); } class _HomeView extends State<HomeView> { @override Widget build(BuildContext context) { return new CupertinoPageScaffold(navigationBar: _navBar(), child: DefaultTextStyle(style: CupertinoTheme.of(context).textTheme.textStyle, child: new Container())); } Widget _navBar() { return CupertinoNavigationBar(previousPageTitle: "Home", middle: Text("Home")); } } |
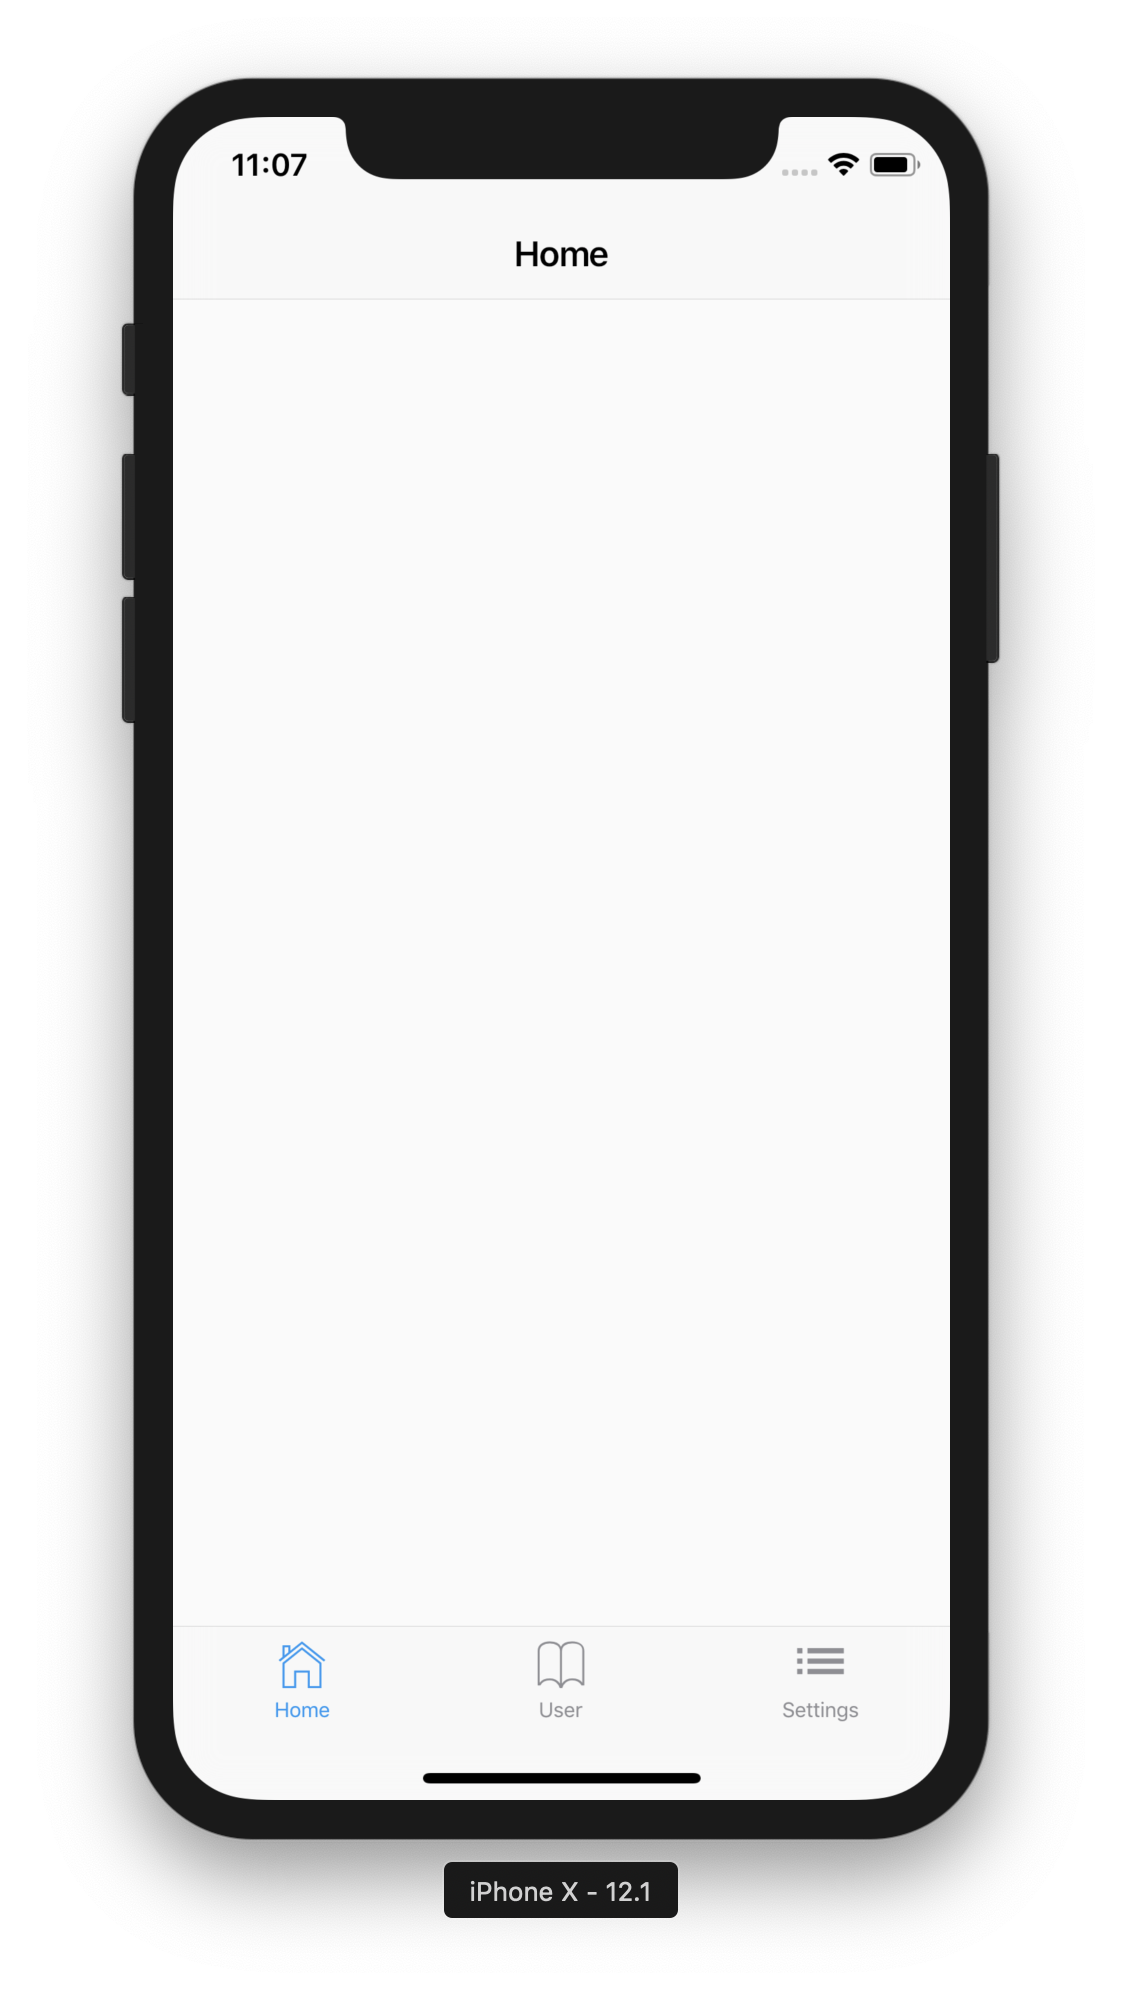
After placing the CupertinoTabBar, CupertinoNavigationBar widgets inside the CupertinoTabScaffold and CupertinoPageScaffold layout structure, the Flutter app looks like this:
Navigation
To add navigation options, eg. pushing a screen with the name "/detail" to our stack, we can use following method.
|
1 |
Navigator.of(context).pushNamed('/detail'); |
To pop this screen we can use.
|
1 |
Navigator.of(context).pop(); |
We can add all the routes we want to use in our main.dart file.
|
1 2 3 4 5 |
routes: <String, WidgetBuilder> { '/detail': (BuildContext context) => new DetailView() }, |
UIBarButtonItem
In iOS we can add UIBarButtonItems to our navigation bar on the right/left as rightBarButtonItem or leftBarButtonItem. In Flutter we can add a CupertinoButton as trailing to our navigation bar to achieve a similar look to a rightBarButtonItem.
|
1 2 3 4 5 6 7 8 9 10 11 |
Widget _rightBarButtonItem() { return CupertinoButton(child: Icon(CupertinoIcons.info), onPressed: () {}); } Widget _navBar() { return CupertinoNavigationBar(previousPageTitle: "Home", middle: Text("Home"), trailing: _rightBarButtonItem()); } |
UIAlertController
In iOS we can show additional information with an UIAlertController. There are two possible styles: actionSheet and alert. In Flutter we have the CupertinoAlertDialog and CupertinoActionSheet widgets which can do this job. The following example opens a CupertinoAlertDialog when we are pressing the rightBarButtonItem in our navigation bar.
|
1 2 3 4 5 6 7 8 9 10 11 12 13 14 15 16 17 18 19 |
Widget _rightBarButtonItem(BuildContext context) { return CupertinoButton(child: Icon(CupertinoIcons.info), onPressed: () { showCupertinoDialog(context: context, builder: (context) { return _alert(context); }); }); } Widget _alert(BuildContext context) { return CupertinoAlertDialog(title: Text('Info'), content: Text('This is an information text.'), actions: <Widget>[new CupertinoButton(child: Text("OK"), onPressed: () { Navigator.pop(context); })],); } |
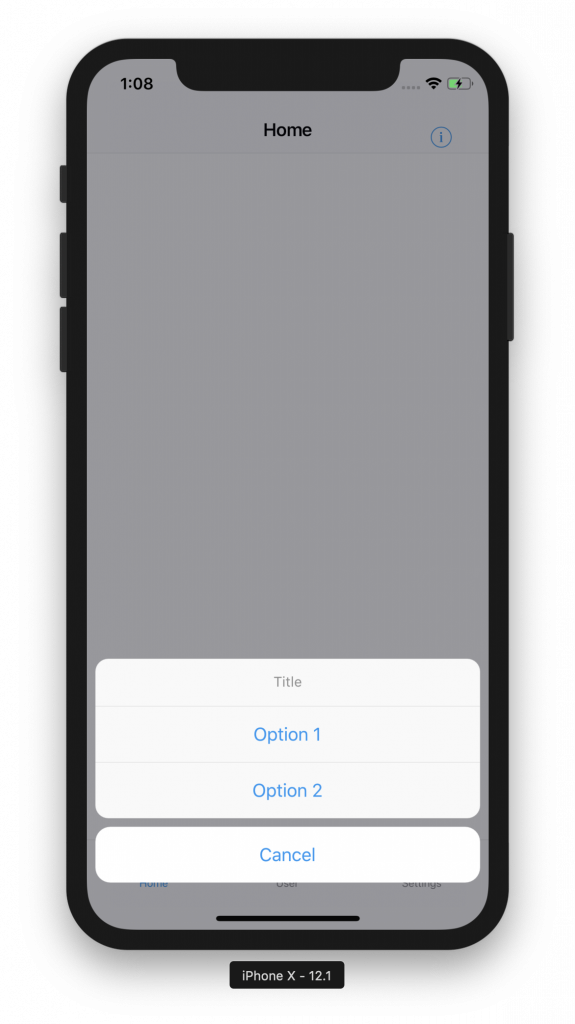
we can show an action sheet with a smiliar procedure. We have to use showCupertinoModalPopup instead of showCupertinoDialog and instead of a content field we only have actions and cancelButton.
|
1 2 3 4 5 6 7 8 9 10 11 12 13 14 15 16 17 18 19 |
Widget _rightBarButtonItem(BuildContext context) { return CupertinoButton(child: Icon(CupertinoIcons.info), onPressed: () { showCupertinoModalPopup(context: context, builder: (context) { return _actionSheet(context); }); }); } Widget _actionSheet(BuildContext context) { return CupertinoActionSheet(title: Text("Title"), actions: <Widget>[new CupertinoButton(child: Text("Option 1"), onPressed: () {}), new CupertinoButton(child: Text("Option 2"), onPressed: () {})], cancelButton: new CupertinoButton(child: Text("Cancel"), onPressed: () {})); } |
UIWebView/SFSafari
We can integrate a UIWebView with the webview_flutter package. The simplest implementation is to create a WebView widget with the parameter initialUrl which is added as a child to CupertinoPageScaffold.
|
1 2 3 4 5 6 7 8 9 10 11 12 13 |
@override Widget build(BuildContext context) { return new CupertinoPageScaffold(navigationBar: _navBar(context), child: DefaultTextStyle(style: CupertinoTheme.of(context).textTheme.textStyle, child: SafeArea(child: _webView()))); } Widget _webView() { return WebView(initialUrl: 'https://www.inovex.de'); } |
Instead of embedding web content we can open it in an external controller such as SFSafariViewController. To do so we can use the url_launcher package.
|
1 2 3 4 5 6 7 8 9 10 11 12 13 14 15 |
_launchURL() async { const url = 'https://www.inovex.de'; if (await canLaunch(url)) { await launch(url); } else { throw 'Could not launch $url'; } } |


UITableView
In iOS we use UITableView to display the content using rows arranged in a single column. We have datasource and delegate methods for UITableView: datasource to provide data that controls the state of the table view and delegate controls how to use the data and manages interactions. In Flutter instead of a table view there is ListView. It takes a list of children and displays them in the scroll direction.
|
1 2 3 4 5 6 7 8 9 10 11 12 13 14 15 |
Widget _listView() { return ListView.builder( itemCount: itemCount, itemBuilder: (context, position) { return listItem(); }, ) } |
More Cupertino Widgets
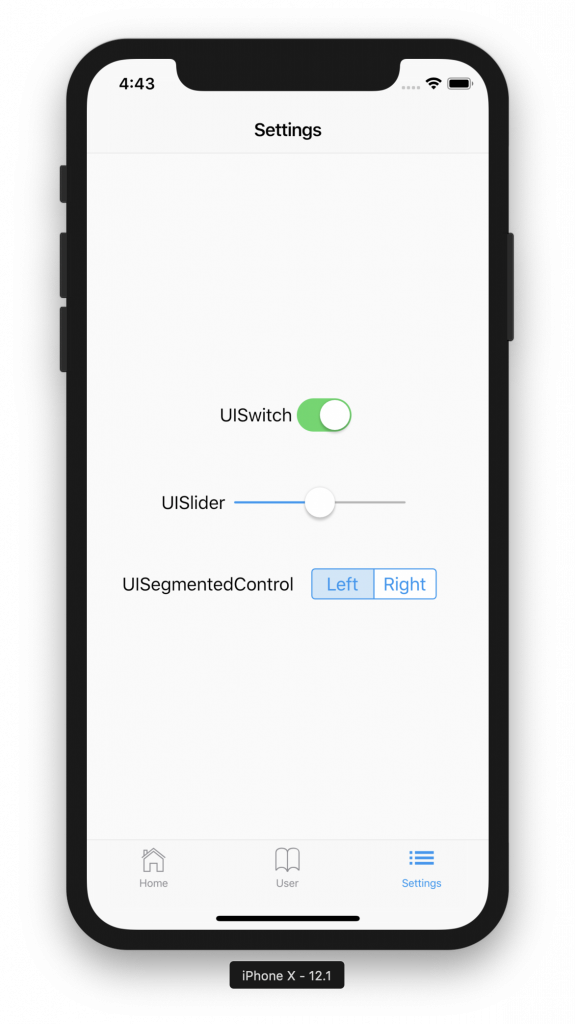
There are a lot of more iOS widgets in the cupertino design package. In the following example we are using UISwitch, UISlider and UISegmentedControl as well as an MKMapView -like component from the map_native package.
|
1 2 3 4 5 6 7 8 9 10 11 12 13 14 15 16 17 18 19 20 21 22 23 24 25 26 27 28 29 30 31 32 33 34 35 36 37 38 39 40 41 |
// UISwitch Widget _switch() { return CupertinoSwitch(value: true, onChanged: (value) {}); } // UISlider Widget _slider() { return CupertinoSlider(value: 0.5, onChanged: (value) {}); } // UISegmentedControl Widget _segmentedControl() { return CupertinoSegmentedControl(children: children, onValueChanged: (value) {}); } // MKMapView var _mapView = new MapView(initialLocation: const LatLong(49.006889, 8.403653)); @override Widget build(BuildContext context) { return CupertinoPageScaffold(navigationBar: _navBar(context), child: SafeArea(child: _mapView)); } Widget _navBar(BuildContext context) { return CupertinoNavigationBar(previousPageTitle: "User", middle: Text("User")); } |

Good to know
In the next step we want to look at a few specific things needed in almost every iOS project. We want to execute native swift code, add our own pods to the CocoaPods installation created by Flutter and we want to take a quick look at fastlane integration.
Execute Native Swift Code
When we want to execute Swift Code from Flutter we can do so with a FlutterMethodChannel. In our next example we are getting the device information, once with Swift passing to Flutter and once with the device_info plugin directly. When we create a flutter project, flutter is automatically adding a CocoaPods installation to our Xcode project and is managing its own dependencies with it.
Adding a pod to the Flutter CocoaPod installation
We can simply add our own pod by adding it to the Podfile in the iOS subfolder. In the following example we added the pod 'Device'.
|
1 2 3 4 5 6 7 8 9 10 11 12 13 14 15 16 17 |
... target 'Runner' do use_frameworks! pod "Device" # Prepare symlinks folder. We use symlinks to avoid having Podfile.lock # referring to absolute paths on developers' machines. system('rm -rf .symlinks') system('mkdir -p .symlinks/plugins') ... |
We need to add the following lines to Debug.xcconfig and Release.xcconfig so that Xcode can find the added pods.
|
1 |
#include "Pods/Target Support Files/Pods-Runner/Pods-Runner.debug.xcconfig" |
|
1 |
#include "Pods/Target Support Files/Pods-Runner/Pods-Runner.release.xcconfig" |
Method channels in Swift
After this we can add a FlutterMethodChannel in our AppDelegate by adding it in applicationDidFinishLaunchingWithOptions. The name „samples.inovex.com/native“ identifies the channel. The binaryMessenger is a facility for sending raw messages to Flutter.
|
1 2 3 |
let controller: FlutterViewController = window?.rootViewController as! FlutterViewController let nativeChannel = FlutterMethodChannel(name: "samples.inovex.com/native", binaryMessenger: controller) |
We need to add a method call handler to our FlutterMethodChannel to handle defined methods. In our case we specified the method „deviceVersion“, which is given the return value from the method deviceVersion() as a FlutterResult to Flutter.
|
1 2 3 4 5 6 7 8 9 10 11 12 13 |
nativeChannel.setMethodCallHandler({ [weak self] (call: FlutterMethodCall, result: FlutterResult) -> Void in if call.method == "deviceVersion" { result(self?.deviceVersion()) } else { result(FlutterMethodNotImplemented) } }) |
|
1 2 3 4 5 |
private func deviceVersion() -> String { return String(Device.version().rawValue) } |
Method channels in Flutter
Back in Flutter we can access the defined method from our channel with these lines:
|
1 2 3 4 5 6 7 8 9 10 11 12 13 14 15 16 17 18 19 20 21 |
static const platform = const MethodChannel('samples.inovex.com/native'); Future<void> _getNativeDeviceVersion() async { try { final String result = await platform.invokeMethod('deviceVersion'); setState(() { _nativeDeviceVersion = "$result"; }); } on PlatformException catch (e) { print("Failed to get device version '${e.message}'."); } } |
We can get the same information directly with the DeviceInfoPlugin from Flutter.
|
1 2 3 4 5 6 7 8 9 10 11 12 13 |
void _getDeviceVersion() async { DeviceInfoPlugin deviceInfo = DeviceInfoPlugin(); IosDeviceInfo iosInfo = await deviceInfo.iosInfo; setState(() { _deviceVersion = iosInfo.model; }); } |
When we change code in Swift we can’t use the hot reload feature in Flutter. We have to quit and restart the app to see the changes. In the following screenshot we have two labels, one with the output from the native Swift code and one with the output directly from Flutter.

Network Requests
For network requests we can use the http package and for JSON decoding we have to import dart:convert. A simple network request can be made with the get method from http.
|
1 2 3 4 5 6 7 8 9 10 11 12 13 |
_loadData() async { String url = "https://jsonplaceholder.typicode.com/posts"; http.Response response = await http.get(url); setState(() { widgets = json.decode(response.body); }); } |
User Defaults
In Flutter can we use SharedPreferences for storing and reading data from UserDefaults.
|
1 2 3 4 5 6 7 8 9 10 11 12 13 14 15 |
_read() async { SharedPreferences sharedPreferences = await SharedPreferences.getInstance(); return (sharedPreferences.getInt('counter') ?? 0); } _store(int counter) async { SharedPreferences sharedPreferences = await SharedPreferences.getInstance(); await sharedPreferences.setInt('counter', counter); } |
Fastlane
When the project can be built successfully from command line with the command flutter build ios --release --no-codesign we can start with the fastlane configuration. The initial setup can be made with fastlane init from the ios subdirectory. After this we can edit Appfile and Fastfile and start a build with fastlane [name of the lane]. This can be easily integrated in a continuous integration pipeline like Jenkins or GitLab CI.
Conclusion
Flutter is a very interesting technology and is getting a lot of attention since December 2018, when Google made the first stable version public. Cross-platform development is very popular because you don’t need more teams with different technology stacks. You can build everything with one team and one code base which is reducing cost and complexity. Once you understand the concept of Flutter you can develop effectively and with a lot of fun. Of course there are limitations but it’s a young technology with a promising future. We will follow the technology and we are curious how it will develop in the future.
Find out more about our Android and iOS portfolio or join us as a mobile developer!
